
Steps to create an Apple developer account
What do you need to create an Apple developer account?
Bear in mind that it's necessary to associate the account to an iOS device (iPhone, iPad or Mac) and that this device must be at your disposal afterwards for being able to access your account. The required data are:
- D-U-N-S number (if your company doesn't have one, you'll need to request it).
- Company legal name.
- Information about the company's headquarters (address, city, postal code and office phone number).
- Contact information (full name, position in the company, e-mail address and mobile phone number).
- Entity type.
- Company website.
- Tax identification code.
1 – Apple ID creation
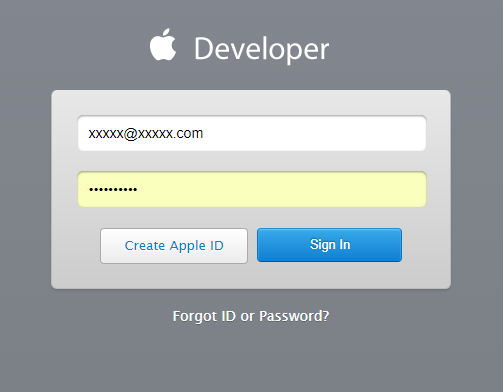
1.1 - If you already have a specific Apple ID for your developer account, you may log in through this link: https://developer.apple.com/account
1.2 - Should you need to create an Apple ID, you'll access the same link (https://developer.apple.com/account) and press Create yours now.
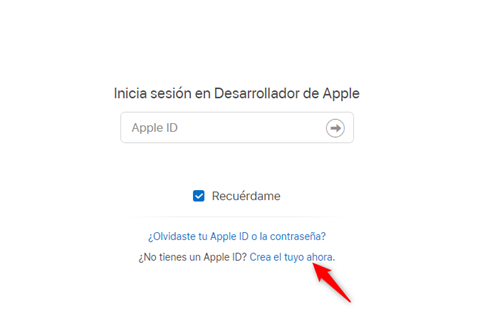
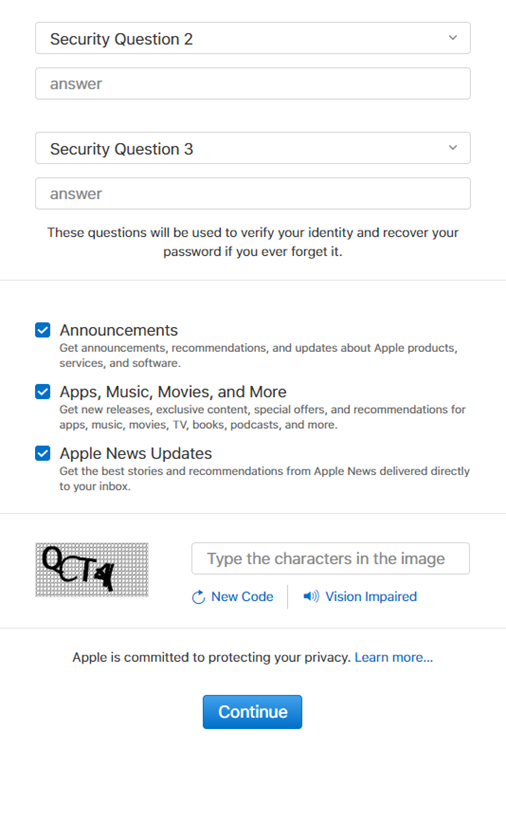
1.3 - Fill the following form.
*The name associated to the Apple ID must correspond to that of a physical person inside the organization with permission to carry out this task. Please remember to take not of certain data provided, such as e-mail address, password and the three security questions.

1.4 - Once you've filled the form, press Continue. You'll receive a confirmation e-mail with a code that you'll need to introduce in the following screen.
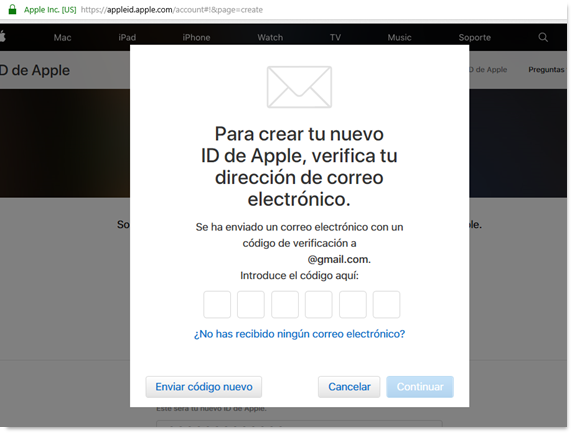
Press Continue. You'll receive a confirmation message that the creation of your Apple ID was successful.
2 – Activation of two-factor authentication
Recently, with the aim of ensuring a higher level of safety, Apple requires the activation of the two-factor authentication in all Apple IDs associated to a developer account. To do this, you need to access an iOS device (iPhone, iPad or Mac), log in iCloud with your new Apple ID and follow these steps:
- Access the Settings in your Apple device and press iCloud.
- Press on your account on the top area and select Password and security.
- Press Two-factor authentication.
- Activate it and accept the warning (to proceed you'll need to remember the answers to the three security questions of your Apple ID).
- Press Continue. Ensure your phone number is correct and choose whether you'd prefer to receive calls or text messages for verification.
- Press Next on the top-right area and introduce the access code.
- Accept by pressing Continue that the access code will replace the iCloud security code.If you have any doubts, please visit this link.
3 - D-U-N-S number request
3.1 - In case of already knowing the D-U-N-S number of your organization you may access this URL and jump to step 4: https://developer.apple.com/programs/enroll/
3.2 - If you don't have the D-U-N-S number, you may request it through this link: https://developer.apple.com/enroll/duns-lookup/
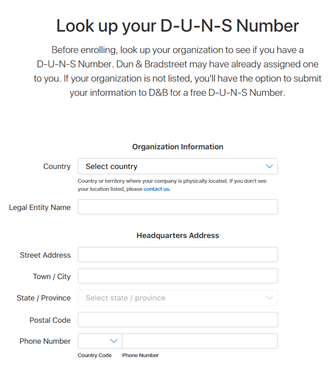
Fill the form and press Continue. You'll see a message and receive an e-mail confirming that the request of the D-U-N-S number has been successfully processed and will be provided within 2-3 working days. Sometimes the D-U-N-S number is sent immediately, so you may check your e-mail inbox right away. Once received, you may proceed with the enrollment through this link: https://developer.apple.com/programs/enroll/
4 - Start your enrollment
4.1 - Introduce your Apple ID credentials and press Sign in.
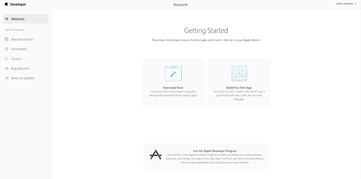
4.2 - Select Join the Apple Developer Program.
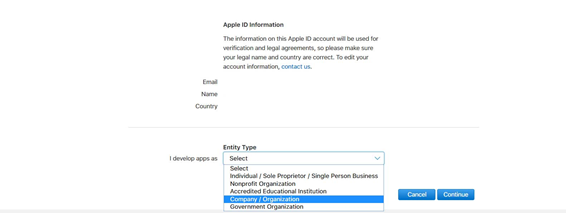
4.3 - Select the entity type.
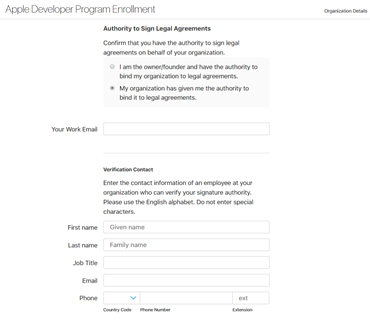
4.4 - Select one of the options (I am the owner / I have the authority) and fill the form.
 4.5 - Press Continue, fill the form and introduce the D-U-N-S number.
4.6 - In case of receiving an error notice on this last form either on the field Legal entity name or with the D-U-N-S number, you'll need to contact the Apple support team by following these steps:
4.6.1 - After logging in, access this URL (https://developer.apple.com/) and click on Support.
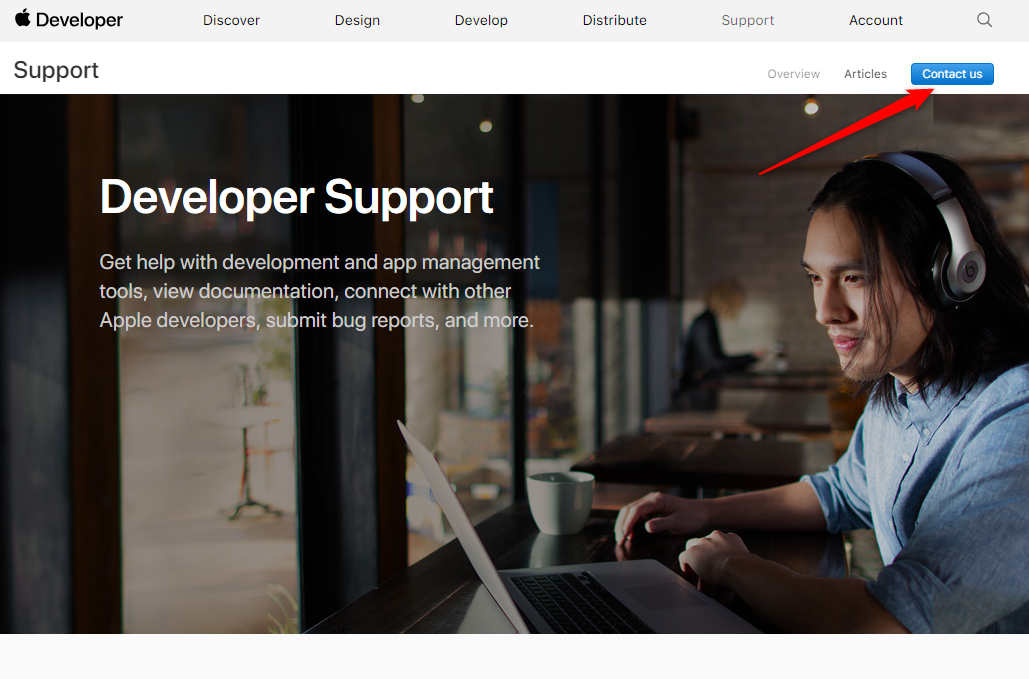
4.6.2 - Press Contact us.
4.6.3 - Press Subscription and account.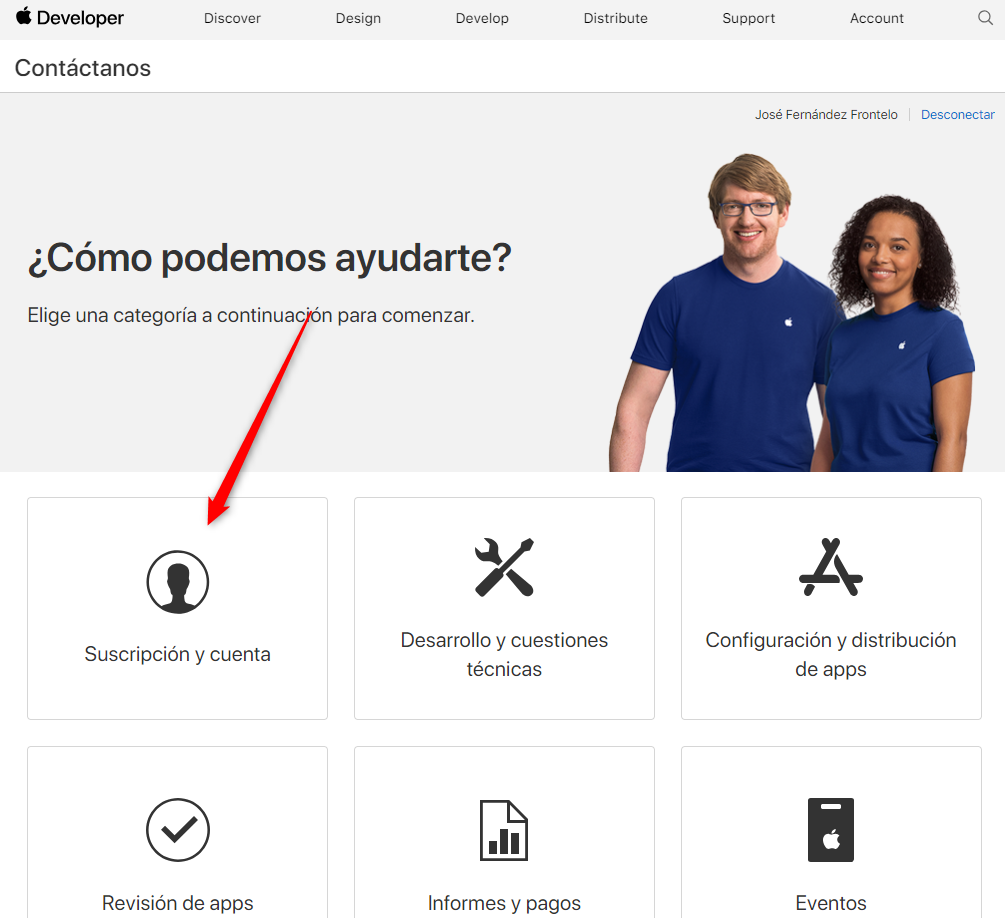
4.6.4 - Choose your preferred option (we recommend the phone call for its immediacy).

5 - Apple confirmation call
Within 1-2 working days after sending the form, the contact person will receive a call from the Apple support team to confirm the request of the developer account creation by your company.
6 - Payment process
After the call, you'll receive an e-mail with instructions for proceeding with the payment process. Fill the form sent by Apple; when asked what are you developing, select iOS: Apps (App Store), although you may also select Android when asked about other platforms.
Press Register and a you'll be asked for your billing information in a new screen. Introduce the data and press Continue.
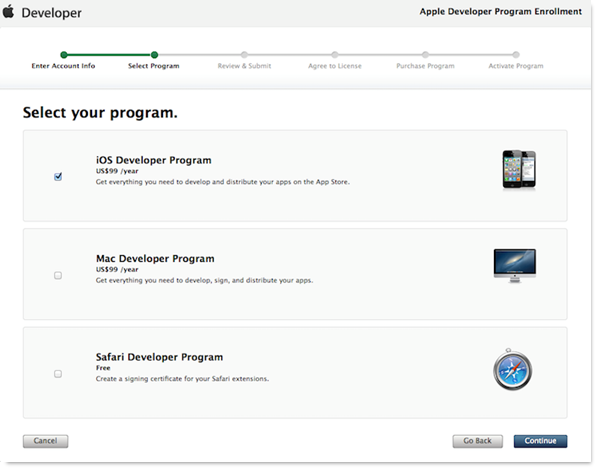
On the next screen, activate the iOS Developer Program checkbox ($99 / year).
 Please check your data on the next screen and press Continue.
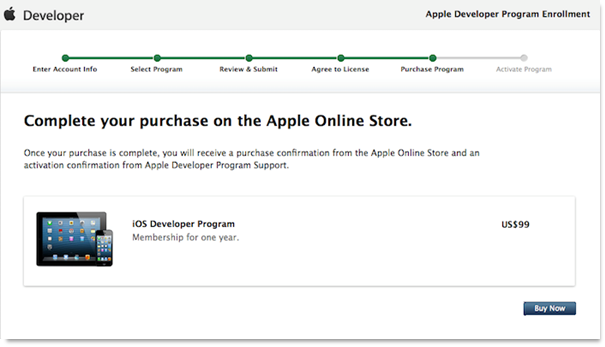
Accept the license contract and press Continue.
Finish the process by confirming your order on Buy now.
7 - Confirmation e-mail
You'll receive an e-mail in which you will be asked to confirm your e-mail address. Follow the instructions provided and you'll receive the access credentials for itunesconnect.apple.comy and developer.apple.com, which you shall send to destek@ver.us under the subject iTunesConnect access credentials.
If you prefer not to share these credentials with the Verus team, you may invite us as administrators of your developer account. Enter App Store Connect and press Users and access to add a new user with admin category and an e-mail address that we'll create and provide you. Please remember to check the Access to certificates, identifiers and profiles option.
*All this process may take up to 15 days. Apple may call you directly to confirm your request.